Strain-Gauge Machine-Tool Probe Has The Right Touch For Form Measurement Of 5-Axis Aerospace Parts
Flat surfaces and straight lines are rare among the parts produced at Triumph Fabrications in Shelbyville, Indiana, USA

Which is a key reason the company upgraded the machine tool probe on one of its high-accuracy portal mills to a strain-gauge-based Renishaw RMP600.
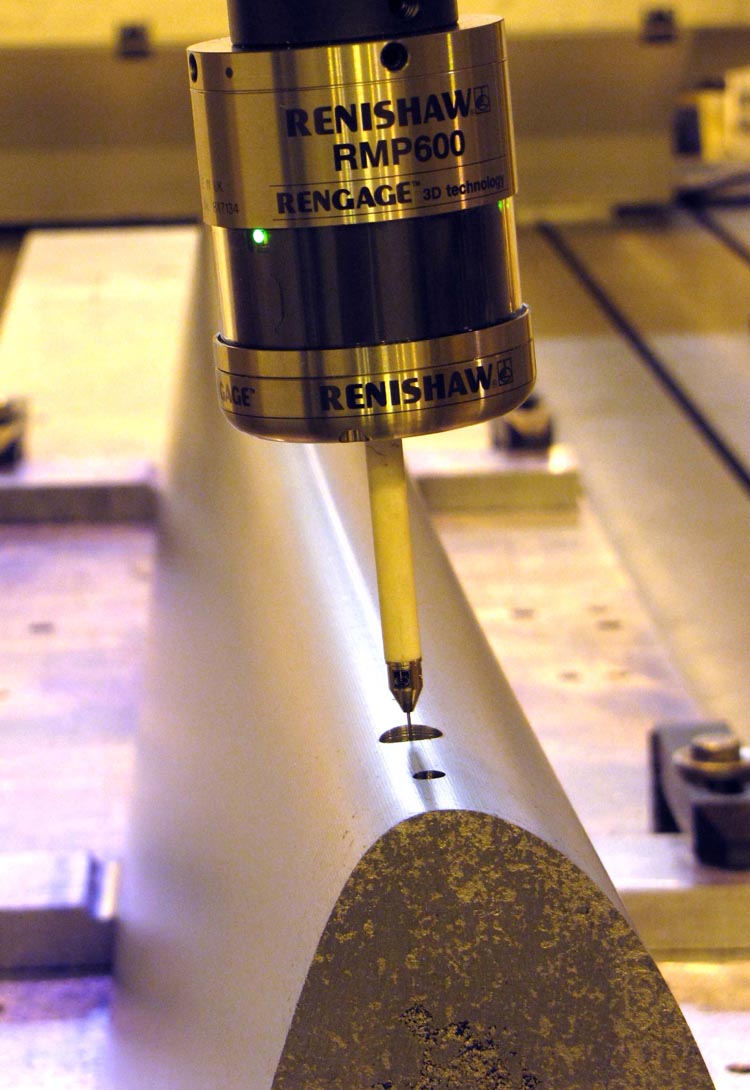
As an aerospace stretch-forming specialist, there’s hardly a part or a die in Triumph’s shop that is not sporting a parabolic, compound curved or cone shape. Rapid, precise measurement of machining work on these parts – while still fixtured on the machine tool – is a core skill the company’s CAD/CAM department developed and refined to facilitate lean manufacturing. But it took an RMP600 strain-gauge probe to bring the refined “touch” needed for consistent, high-accuracy measurement of small hole diameters, contours and geometric tolerances, to name a few. With no lobing (i.e. true 3-dimensional triggering characteristic) and a repeatability of 0.25 μm (0.00001”), the strain-gauge probe delivers high accuracy when triggered from any direction, after a one-time calibration routine.
The RMP600, combined with Renishaw’s OMV Pro software, gives the company’s Zimmerman CNC 5-axis portal mill CMM-like capability, allowing complex parts to be “bought off” the machine with measurement results that routinely come within 0.025 mm (0.001”) when double-checked with other devices. As a result, offline checks of work on a true CMM have been essentially eliminated, saving the company many hours of production delays, potential damage, and accuracy problems that arise when moving and re-fixturing high-value parts.
Triumph Fabrications’ core capability is stretch forming of sheet, extruded, rolled shape and light plate metals for the aerospace industry. The company’s press capacity ranges from 10 to 750 tonnes, with the ability to stretch-form reverse forms using bulldozer attachments of 150 and 400 tons on its Cyril Bath presses. The company also has unique stretch forming capabilities to support complex single-plane and multi-plane forming of a variety of metals.
Various types of CNC machine tools are used to produce features on these formed parts, as well as to shape the forming dies themselves. Supporting this work upstream and downstream is a CAD/CAM department equipped with Catia V4 and V5, Vericut 7.0, Renishaw OMV Pro, AutoCAD, Inventor and other desktop engineering tools.
CAD/CAM Department Manager Gary Medlock says on-machine probing is vital to the company’s goal to reduce cycle time, eliminate rework and reduce errors that can creep in from multiple fixturings of a part. “We prefer to measure as soon as we cut, rather than move the part to a CMM,” he said. “These are high-value parts to begin with, and we’re adding value with each operation on the Zimmerman. On parts such as the forming die for a leading edge (shown in accompanying photos) our alternatives would be to lose nearly a day to tear down, measure, and re-setup the part; or finish the part completely, then inspect, and hope no rework is needed. In-process measurement confirms that each phase of the work meets spec before we put more value in the part.”
More typically, parts processed on the Zimmerman mill are formed sheet metal, 0.635 mm (0.025”) to 3.18 mm (0.125”) thick, that require machined holes and cutouts. These parts are vacuum fixtured. Holes of 2.5 mm (0.098”) to 9.5 mm (0.375”) – typical of aircraft applications – are drilled and reamed to accuracies of 0.05 mm (0.002”), with true position tolerances of .30 mm (0.012”) to 0.71 mm (0.028”). “We measure hole size and true position with the RMP600 probe, using a 1 mm (0.039”) tungsten or stainless steel stylus, 50 mm (1.97”) extension, and the two-touch probing method,” Medlock explains. “We prefer the tungsten ball for the ability to reach deep into a hole. If you are careful about orientation, you can measure just about anything with this ball. The 50 mm extension on an RMP600 probe causes no loss of accuracy, keeps the probe at a distance from the workpiece to minimize crash potential, and is cheaper to replace if there is a collision. We use two-touch probing because we have calibrated at the same speed we’re using in the software, so the timing and angles are all established.”
Machine calibration is one of the keys to Triumph’s success with, and confidence in, its probing results. “We calibrate the machine once a year with a laser and ball bar unless there’s a wreck,” Medlock says. “We also have a small calibration sphere on the machine that we calibrate with once a week, rotating the machine through a known set of angles and touching the sphere with the probe. These results are plotted on a histogram, with data going back two years, so it’s easy to see any trend developing. In addition, we have a traceable artifact with cone, sphere, slots and other features that we probe whenever there’s a change to any component of our QC program.”
CONTACT
Chris Pockett
Renishaw plc
chris.pockett@renishaw.com
www.renishaw.com
+44 (0) 1453 524524
Wednesday 9 March 2011 / file under Aerospace | Automotive | Technology


